Recently I've been playing with my old Raspberry Pi and a camera module (version 2) I bought a while ago. It turns out the camera is quite powerful and allowed me to create various types of videos or pictures. Here's what I've been able to do.
Note 1: In this article, I am using two commands that are meant to take photos or videos, natively installed on Rapsbian: raspistill and raspivid. For a complete user manual, follow this link.
Note 2: Don't forget to adjust the focus by rotating the lens (clockwise to focus on distant objects, anti-clockwise for close objects).
A timelapse of the sky at night
For such night shots, we need to leave the shutter open as long as possible. With this camera, there is a cap at 6 seconds, which is more than enough.
However, taking 6-second-long pictures takes approximatively 45 seconds to be processed by the Raspberry Pi.
There are multiple parameters that affect the look of a photos but after trying a few and a lot of Googling, here is a set of parameters that work pretty well for me:
while true; do \
  raspistill -q 100 -t 1 -ss 6000000 -rot 180 \
  -sh 0 -co 50 -br 50 -sa 0 -ev +2 -ex night \
  -awb auto -ISO 800 -mm average -n \
  -o "$(date -u +'%Y-%m-%dT%H:%M:%S').jpg"; date; \
  done
This command takes as many shots as possible in a infinite loop, and displays the date and time between two shots in the terminal.
Here the parameters -awb auto, -mm average and -sa 0 seem to have no impact, I believe they are the default values. The rest makes a difference.
Live streaming on Youtube
This is fairly easy and cool to do! Head out to https://studio.youtube.com/channel/UC/livestreaming and retrieve a "Stream key".
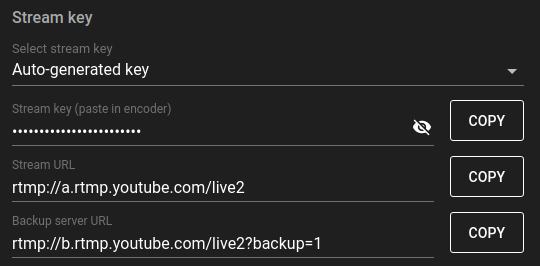
Then:
raspivid -o - -rot 180 -t 0 -w 1280 -h 720 -fps 25 -b 4000000 -g 50 \
  | ffmpeg -ar 44100 -ac 2 -f s16le -i /dev/zero -f h264 -i - \
  -vcodec copy -acodec aac -ab 128k -g 50 -strict experimental -f flv \
  rtmp://a.rtmp.youtube.com/live2/<your-secret-key-here>
This would create a live stream with no audio. To add an audio track that repeats itself, do:
raspivid -o - -rot 180 -t 0 -w 1280 -h 720 -fps 25 -b 4000000 -g 50 \
  | ffmpeg -stream_loop -1 -i ./audio.mp3 -f h264 \
  -use_wallclock_as_timestamps 1 -thread_queue_size 1024  -i - \
  -map 0:0 -map 1:0 -vcodec copy -acodec copy -g 50 -strict experimental -f flv \
  rtmp://a.rtmp.youtube.com/live2/<your-secret-key-here>
-use_wallclock_as_timestamps makes a warning message about no timestamps disappear. -thread_queue_size 1024 makes another warning message disappear.
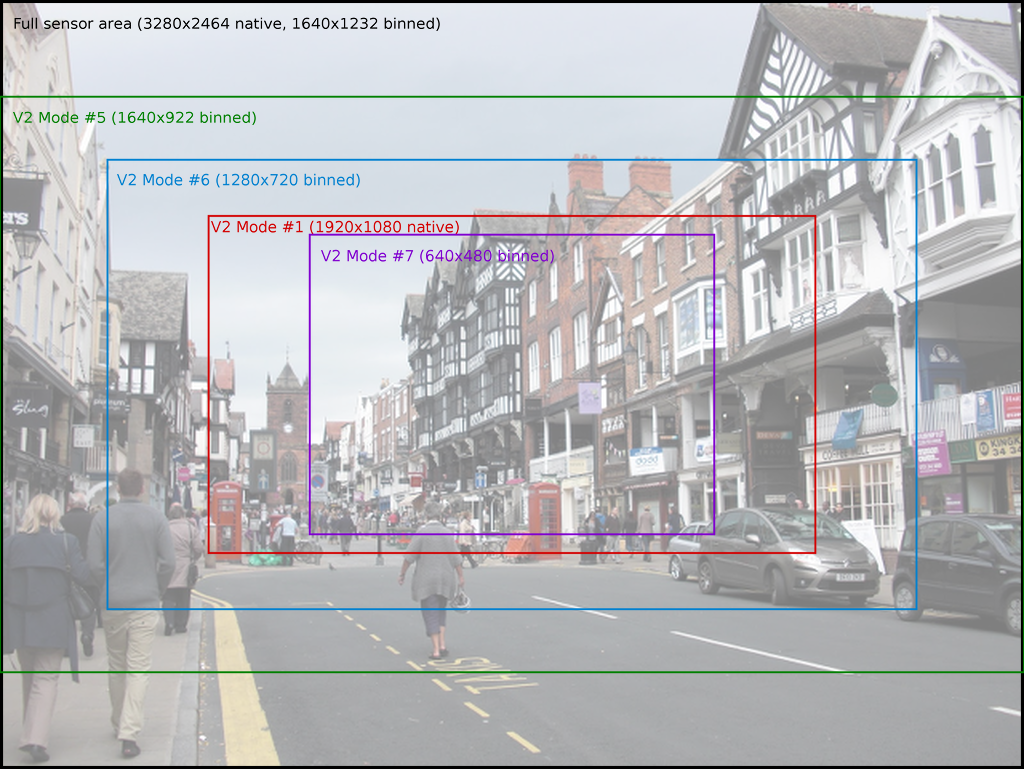
With a height of 720 pixels, close to the full width of the sensor is used. If instead we had used 1920x1080, the image would be slightly cropped.
Daytime timelapse
Here, it's pretty much like a nighttime timelapse, except that we don't need as many parameters, the default ones should normally do a decent job. Also, since taking a picture is here much more faster, we must schedule the shots. Every 20 or 30 seconds is usually a safe bet. Since we can't predict with certainty how long taking the picture will take, in order to take timely shots, we must run a script in the background to take the photo and wait x seconds in an infinite loop:
while true; do ./take-pic.sh; sleep 20; done
And the file ./take-pic.sh (don't forget to chmod +x ./take-pic.sh):
#!/bin/bash
echo "Taking pic..."
name="$(date -u +'%Y-%m-%dT%H:%M:%S').jpg"
raspistill -q 100 -rot 180 -n -awb sun -co 20 -o "$name" &
date
That's it for today!